Note: I originally took the pictures and wrote these directions to help
a friend with her stays. This is a work in progress; please let me know
if there are any points that need clarification.
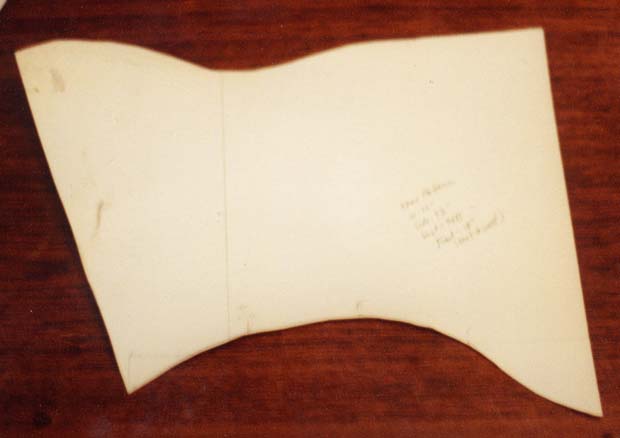 |
1.This is the mockup from Drea's Elizabethan Corset instructions. I find that I usually need to adjust the mockup over the hips and under the armpits. |
|
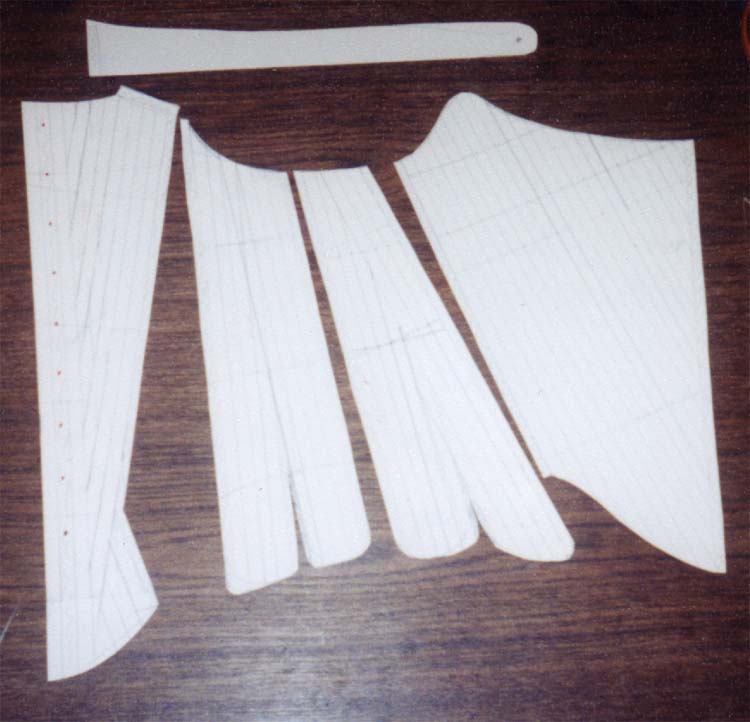
2. I've cut up one half of the mockup into pieces that will correspond to the pieces of the corset. For a look at period corset styles, go here: |
|
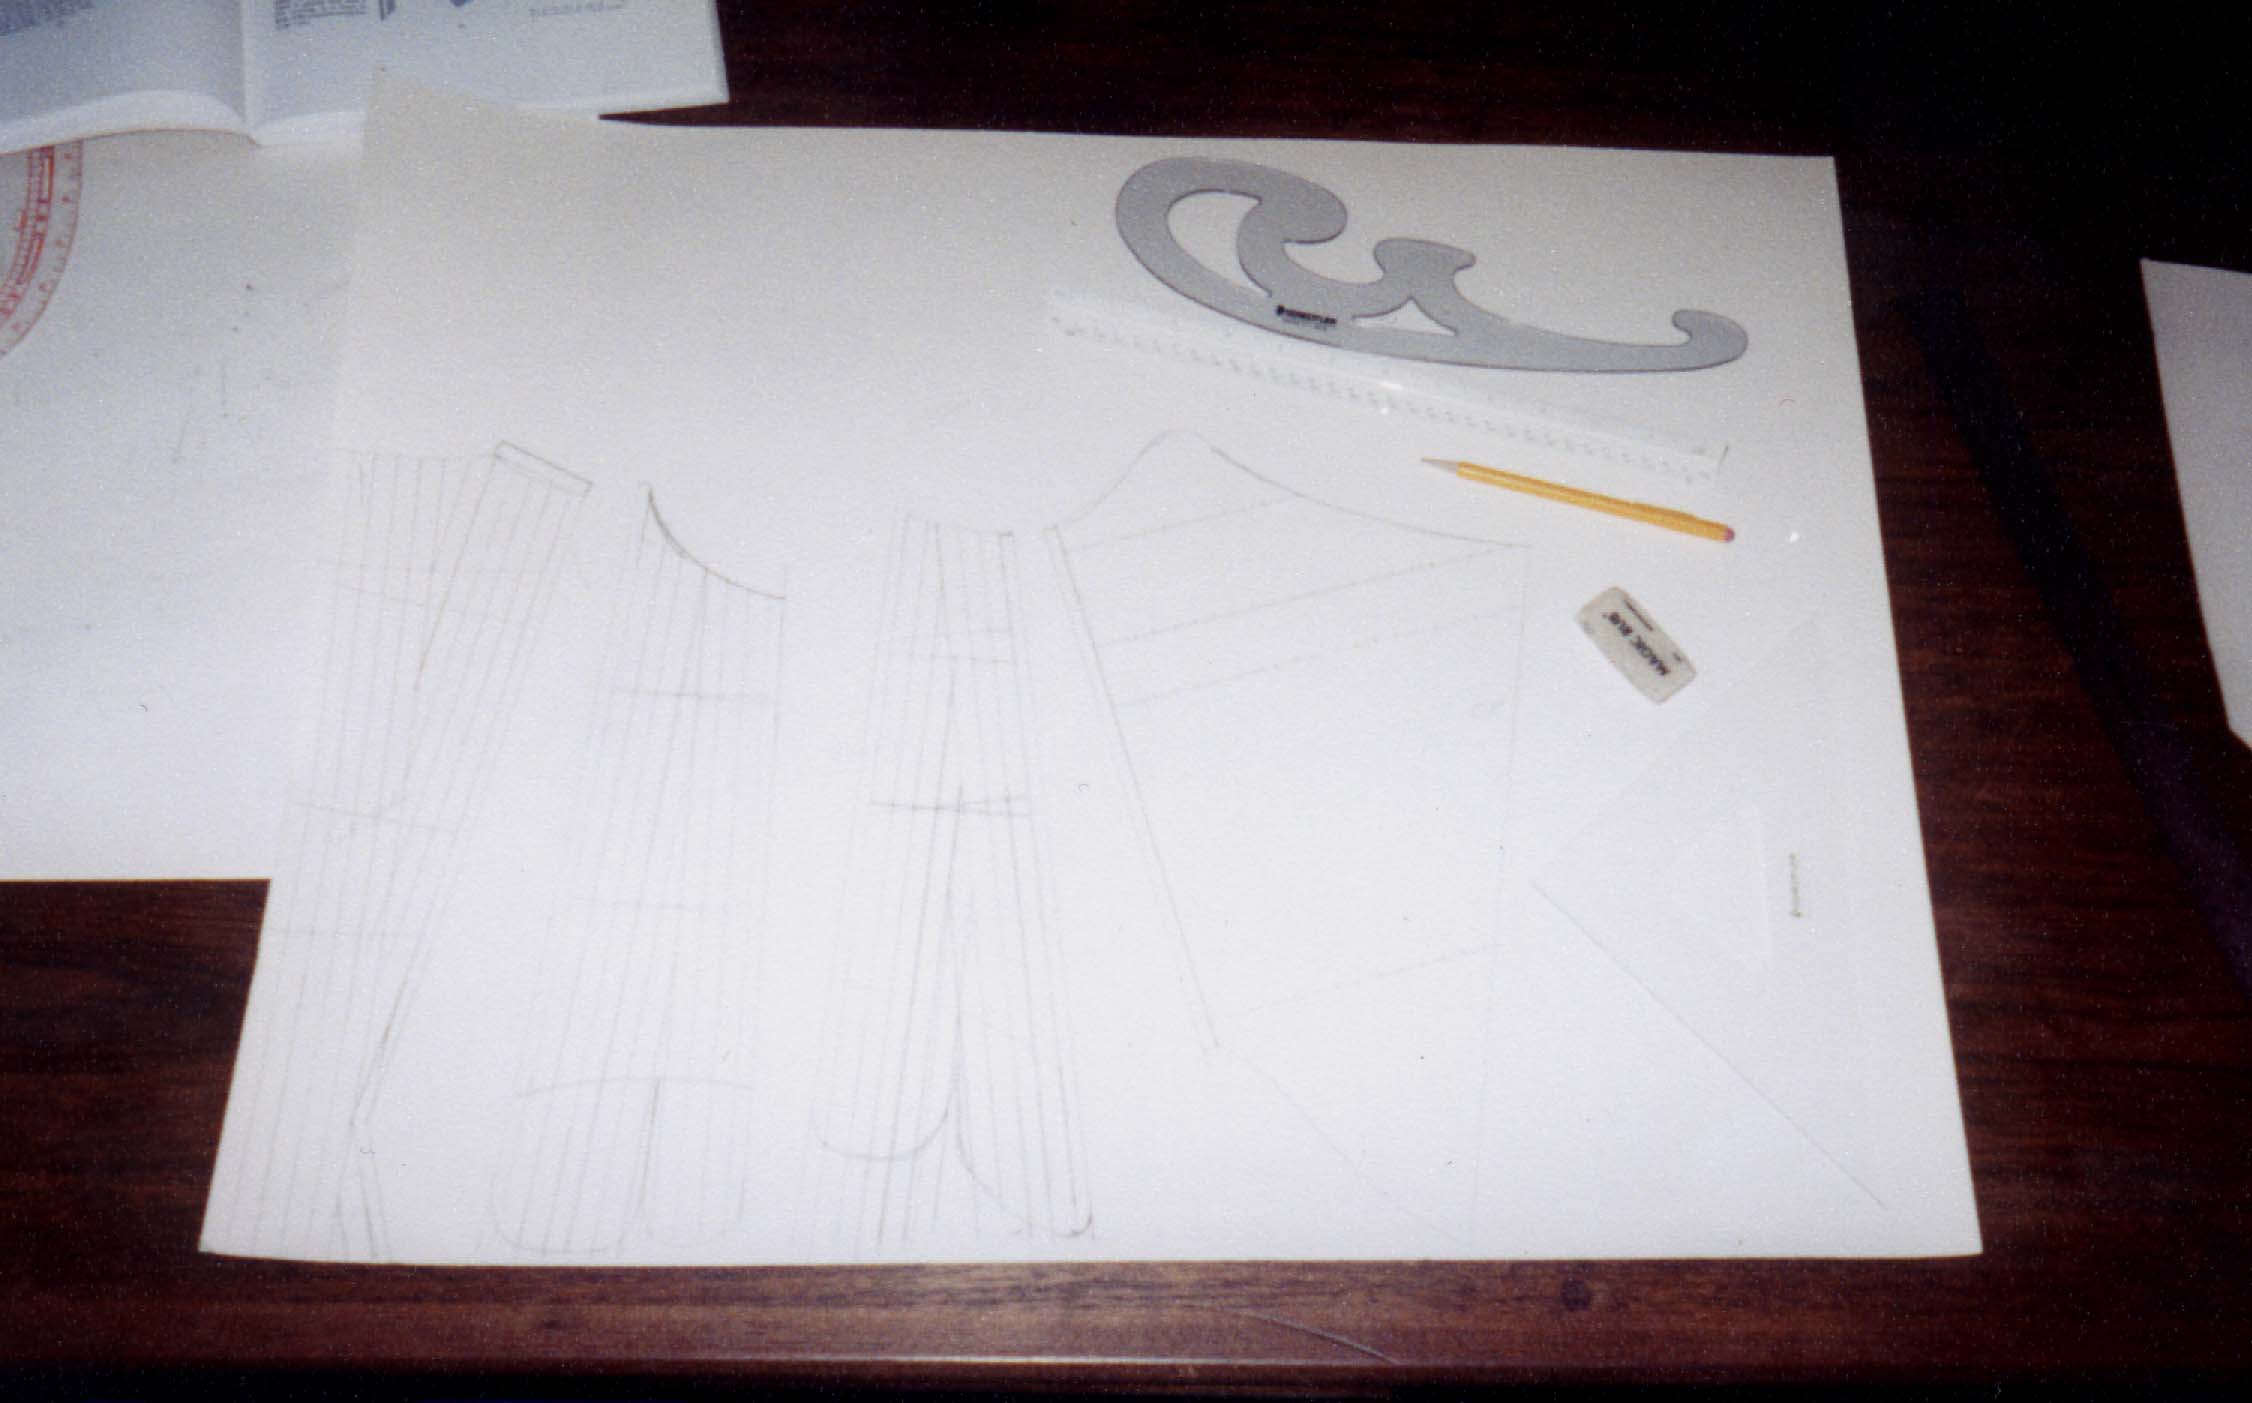 |
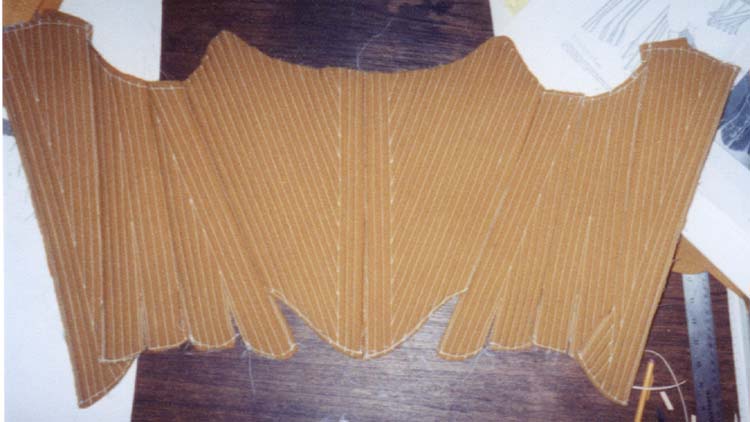
I think if you blow this up you can see
where I'm drafting in the lines for boning. If the boning lines don't
work out, I can adjust them at this point. I've also added 1/2"
seam allowance to each piece, and added the tabs at the bottom of
each piece. I like my tabs about 2-1/2 inches long, and since
I'm using basket caning rather than steel, I want at least three,
usually four or five, boning channels per tab. Otherwise I don't
think the tabs will be stiff enough and will break.
Boning channels: I'm using an architect's scale, which conveniently
has one edge with markings at 3/8". I use an architect's
square to draw two lines at right angles from each side of the piece.
Then I mark along each line at 3/8" intervals (starting at
the edge), until I get to the middle. You can see the results
better in the next picture. After I have the lines marked
in, I figure out the final configuration for the tabs. |
 |
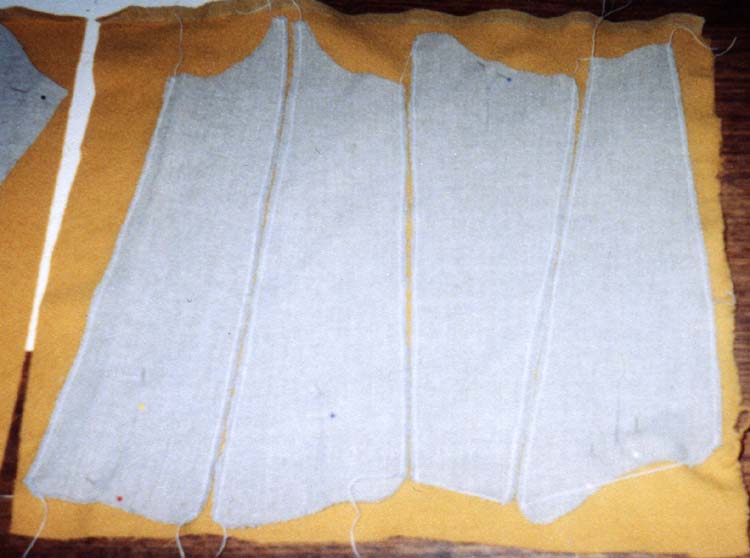
Here you can see the finished pattern
pieces, complete with drafting lines.
For the center back, you can see that the lines are slanted inward, following the side-back edge of the piece, except on either side of the center back, where you need one vertical piece of boning on either side of the lacing holes, for strength. The shoulder strap is at the top. It's way too long, deliberately
so -- I adjust the length after the whole thing is assembled and
I'm ready to sew the leather binding on. |
 |
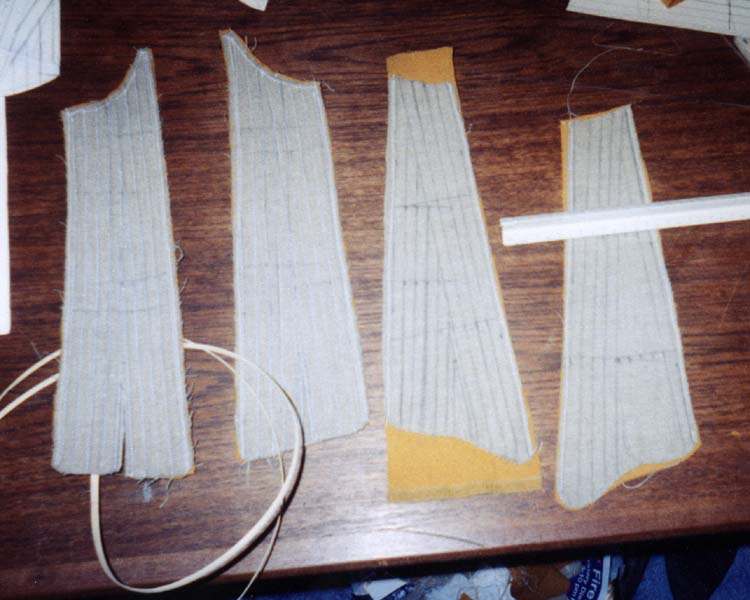
Here I've cut out the individual pieces
in linen, and have them pinned to the outer material, which is a mustard-colored
lightweight wool. I found that sewing the interior linen canvas
to the wool, then cutting around the pieces, is much easier than cutting
out all the pieces and then trying to keep all the edges aligned when
I sew them.
You can't see it very well from the angle of the camera, but the
pieces all pretty much are aligned with the grain of the fabric.
|
 |
Here you can see (right to left) that
I'm drawing the boning channels onto the linen, following the layout
of my pattern pieces; the first shows the process of drawing in the
channels, the second shows all of the channels drawn in. The
third from the right shows (unfortunately, not very clearly) the channels
sewn in, using heavy quilting thread or buttonhole thread. The
fourth picture shows the boning being inserted, and at this stage
I've also cut between the tabs on this piece. |
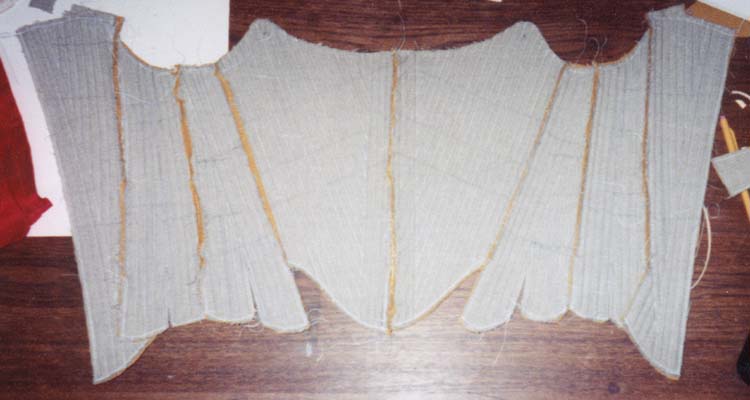 |
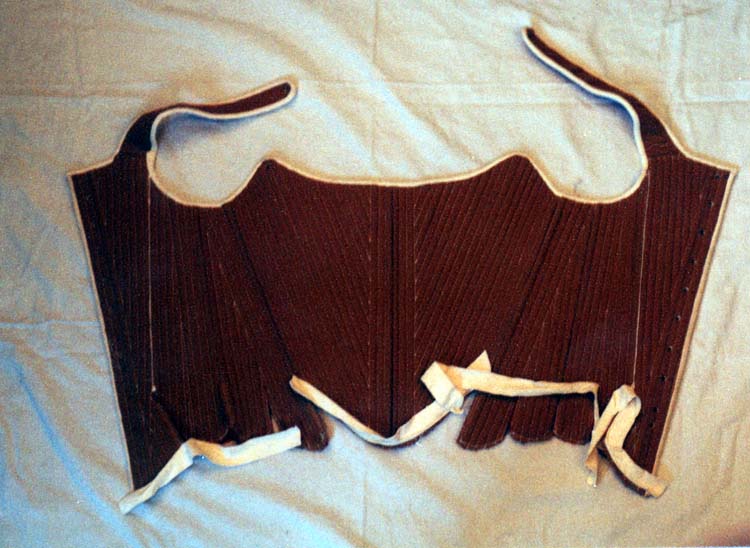
Here you can see all the panels assembled.
I used a zipper foot to get the needle right up to the boning channels.
I ironed the seam allowances and tacked them down with a whip stitch. At this point, you would attach the lining material (not shown) -- you could pin it to the edges and tack it in place with a whipstitch. |
 |
This is the front of the stays at this
point.
Kass wanted it to lace in the back only, but I put three boning
channels in on each of the center front panels, so if she changes
her mind later, she can un-stitch the center seam and remove the
boning from the second channel on each piece, and add lacing holes.
|
 |
This shows the binding partly applied,
and the eyelets have been sewn in. I sewed the eyelets in first,
then adjusted the length of the shoulder straps.
Then I put the binding on the center back and top edges with the sewing machine, sewed it to the right side of the stays and then folded it over to the wrong side and tacked it down with a whip stitch. This is the tough part -- you need a thimble, and it helps to work the leather wet, as that makes it more pliable and easier to punch the needle through. You can see I've also sewn the binding onto the lower edge with
the machine where possible. I had to sew the binding onto
the tabs by hand, as they're too fiddly to do with the machine.
I've managed to do the tabs with a machine before, but I just had
trouble with this set... not sure why. |
 |
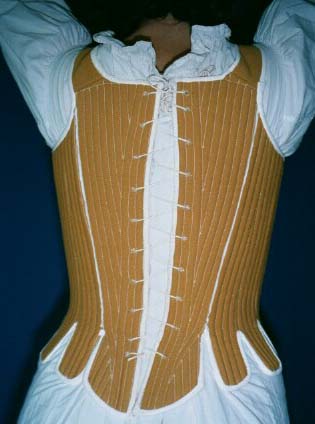
The finished stays! |
 |
|
|
Last but not least, an article on how
to lace one's stays, from the NWTA site
|
|
|
Available period stays patterns such as those by J.
P. Ryan, Mill
Farm, or Mantua
Maker can be altered using this method.
|
|
|
June 29, 2004: Review of Butterick pattern #4254
Someone asked about this pattern on the 18CWoman list, so I went out and got a copy. Immediate impressions: |
|
|
|
![]()